My friend Steve came over for a game of Napoleon at War last Thursday (22nd October). He had to miss out on the Leipzig game so was desperate to get a game in. We had been playing a lot of 1813 type games in the build up to Leipzig so for a change we opted to use lists from the 100 days campaign book. Steve chose a British Infantry division and I went for a French infantry division.

We opted for 1500 pts each.
We randomly rolled for the scenario and got a 3, "Rearguard action." For this scenario the game is played down the length of the table.
Set up

The number of terrain pieces is randomly generated and each piece is randomly generated but placed by the player. So Steve created a decent defensive position by getting some rough ground, a hill and an enclosed field across the centre of the battle field. As attacker I placed my hill to cover any advance and the woods and rough ground at either end out of the way.
The Brits place an objective behind the hill, then I place an objective in the rough ground,
The British forces, as defenders, deploy first.The British list consisted of
On table
1 British infantry brigade of 3 battalions (one of which was light infantry).
1 British Hanovarian Brigade of 5 battalions.
1 Horse artillery battery.
1 Foot artillery battery.
Reserves
1 British light cavalry Brigade of 3 Light Dragoon regiments.
1 British Guard Cavalry Regimeny.
1 Dutch-Belgian infantry brigade of 4 battalions.
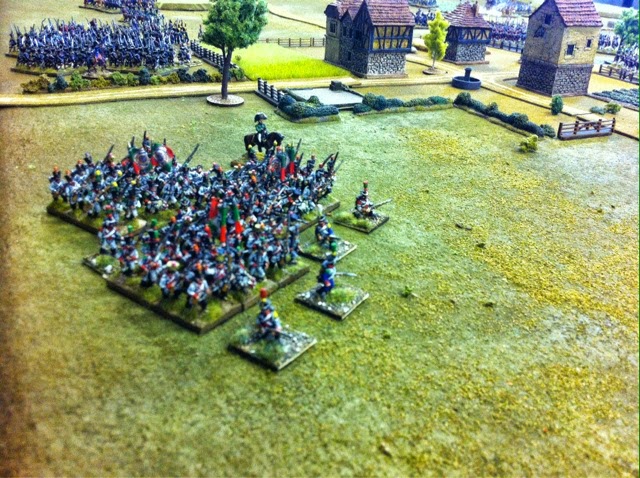
Hanovarians in the enclosed field, British infantry in the rough ground, artillery in the centre.

This scenario is a tricky one but arguably affords the attacker a decent chance of victory as long the attack is decisive in the early turns. The defender only starts to roll for reserves at the end of turn 3. The attacker starts rolling for reserves at the end of turn 1. The British army is a difficult opponent as it's core infantry is very high quality (especially when defending) but it can also have a lot of cheap allies that both boost the number of total forces but also provide decent support.
French Infantry Division 100 Days 1500pts
Organic/ Support
Infantry brigade - 1 light infantry @160
4 Infantry Cons U/S @70. 440pts
Infantry brigade - 1 line infantry U/S @ 90
4 Infantry Cons U/S @70. 370pts
Foot artillery @ 190
Light Cavalry Brigade - 1 lancer @ 130
1 Hussar @ 120. 250pts
Reserve
Heavy cavalry brigade - 2 Cuirassier U/S @ 100. 220pts
With all this in mind, my plan was to attack down the left side. Throw everything at the British holding the rough ground and turn that flank and refuse the other flank. The Hanovarians were holding the enclosed field on the right flank and this provides a strong defensive position.

The French as attackers moved first and advanced according to the plan.


Turn 2
The British Infantry standing in line in front of the Cavalry are just too tempting so the Cavalry charge. The British gamble and rely on firepower to see off the Lancers. Their shooting proves damaging forcing the Lancers to lose a base. This forces the cavalry to take an unfavourable Élan test to charge home and......the French pass!!!

The Lancers roll 6 dice and inflict 5 hits (6's count as double hits for Lancers) and wipe out the British infantry.

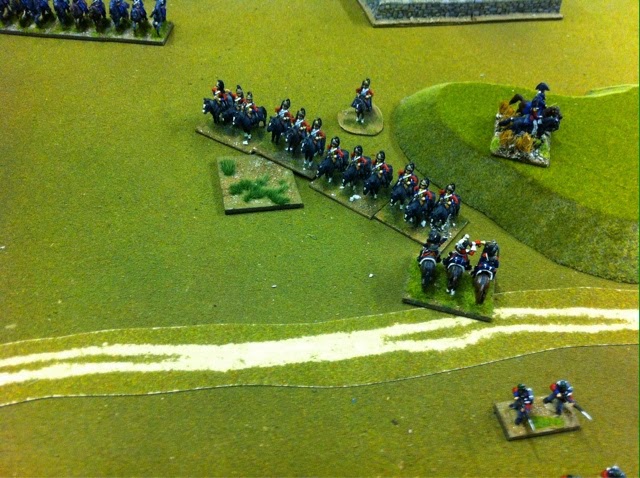
This early break through allows the French cavalry to turn the British right flank.


Luckily the Cuirassiers arrive as reserves (not in shot) but have to move through the woods (that I'd placed!) to get into position.
The Hanoverians move out of the enclosed field to put pressure on the French right whilst bringing units across to support the centre.

The Hanovarians then charge the French on the far right and rout them!

Their success suddenly threatens to turn the French right flank!!

The French light cavalry brigade continue around the British right flank. The Lancers, despite their success, are a spent force. One more base loss would destroy the regiment and potentially the brigade.

The French infantry assault and destroy the second British line unit. Charging British infantry is always risky because when charging British infantry that are in line, if you fail to charge home then the British immediately charge you back and melee occurs without an élan test!
Also, the French infantry in the center, in a desperate measure assault the artillery battery to their front and, surviving the hail of canister destroy the battery. With the loss of the British infantry battalion the artillery crew had nowhere to shelter and so opted to try and shoot the infantry out but failed.

BUT.... a school boy error meant the French nearly grabbed defeat out of the jaws of victory!!!
Over on the French right the threatening Hanovarians forced the French light infantry to retire, so the Light infantry turned around in the movement phase and hoped to turn back around in the support move phase. Unfortunately you can only support move if you are 6" away from enemy infantry and...

So the French Light infantry were caught with their rear showing to the enemy!!!!!
Needless to say the Hanovarians couldn't hold back and assaulted the Light infantry in the rear.

Inevitably the Light infantry are destroyed!!!! And it's the French right flank that now looks vulnerable as the rest of the brigade run from the field!!!!!!

To make things worse for the French the British can now start to roll for reserves and they get one force on. Thus the British cavalry (light dragoons) finally join the fun.

The whole battle has now pivoted 90 degrees

Turn 4
With the arrival of the British reserves the French task becomes much harder. To win they must secure more Victory points than the enemy has active forces on table. As the reserves arrive the number of victory points needed gets higher.
With just one Hanovarian battalion (now in square) holding the objective in the rough ground the French infantry position manoeuvre to get into position to assault.

In reaction to the arrival of the larger British cavalry force the French Light cavalry must act.

But despite. advantages the French infantry fail to break the square and fall back.

The Lancers, having rested and recovered a base charge one of the British light dragoons and force them to retreat off table.

The Cuirassier move up to support the Light Cavalry.

 The French task is now even harder!


The British come out of square as the French cavalry's attention is drawn elsewhere.
And successfully bring on more reserves, the British Guard Dragoon Regiment and the Dutch infantry brigade (my British army is more Peninsular orientated so Spanish figures stand in for Dutch..Sorry!)
Turn 5
Desperate now the remaining French infantry hurl themselves against the Hanovarians. They finally succeeed in destroying the Hanovarian unit holding the objective but are bloodily repulsed from assaulting them on the new French right flank. But capturing the objective gets another Victory Point.
The Cuirassiers move up to take over from the French Light Cavalry but the position now looks bleak for a French victory.
The Hanovarians attempt to take back the objective.
But wait!!!! We suddenly remember that the Hanovarians (like the British infantry) are Line drilled and cannot charge when in column!!!! So they return to thier positions and have to glower menacingly at the French instead!!!
The British Light Cavalry retire from the threat of the Cuirassiers and look to consolidate their position. In this scenario there are no draws so no matter how many Victory points the attacker gets, if it's not enough to break the defenders army then the defenders win, they just have to hold on one more turn.
But can you spot the allies mistake??
Turn 6 .... Last turn!
It's make or break time for the French. Having secured 3 Victory Points a further two more were needed, as the British still 5 forces on table, and just one turn in which to do it! A very tough ask.
Time for the French Heavy Cavalry to step up!
In retiring the British Light cavalry out of danger the Dutch were now in view of the Cuirassiers and they were still in line. There is much debate amongst Napoleon at War players as to wether the rules have got the Cavalry v Infantry mechanic right. For me it has and here is why.
One Cuirassier regiment launches itself at the Dutch infantry. The infantry has essentially 2 options, it can try and form a square or shoot at the cavalry. To form square the infantry must pass an unfavourable discipline test, in other words it must pass the test twice (average disciplined infantry need to roll a 4 to pass). As the odds are not brilliant many people opt to shoot instead. Simply by shooting the Cavalry must now pass an élan test to charge home and if they suffer casualties that test becomes unfavorable. These options have meant that many players feel the mechanic is broken because it should be easier for infantry to form square or easier for cavalry to charge a line. Many players prefer to stand in line and don't think about forming square at all.
The thing to remember is the time to form square was in the previous movement phase, not to wait for the cavalry to be hurtling towards you. Thus to form a square in such circumstances should be difficult. Cavalry on the other hand would think twice before charging infantry in line frontally. They preferred to attack infantry in the flank or rear so as to avoid getting shot at. So having to pass an élan test to charge home is very reasonable. The thing to remember is once the cavalry actually makes contact, the infantry is usually anhilated unless it's in square.
So the Cuirassiers hurl themselves at the Dutch and the Dutch opt to shoot at the cavalry. They fail to get a hit and the brave Cuirassiers pass their élan test and destroy the infantry. Successful cavalry get a breakthrough charge and so they smash into the infantry behind the first and wipe out the second battalion. In one quick action the Dutch brigade is destroyed and another Victory point is won :-)
The second Cuirassier regiment desperately charges the Hanovarian infantry (also in Line). This time it takes a casualty in the shooting as it charges home and so must pass an unfavourable élan test.
A 5 and a 3 are rolled!!! At first we thought they had failed to charge home but then realised that as the Cuirassiers are 'Brave' they need 3's to pass and so the élan tests are passed. Again once in melee the Cavalry simply obliterate the infantry and breakthrough on to the British Guard Cavalry to try and win the game.
But exhausted by their charge on the infantry the Cuirassiers fail to break the Guard cavalry and are themselves destroyed by the fearsome British Guards!
The Cuirassiers fail in their death or glory attempt to win the game but there is one more chance to win the game. In destroying the Hanovarian battalion their whole brigade was wavering. A desperate charge from the French infantry could win the day ...........and.................. VICTORY!!!!!!!!
The French infantry destroys the Hanovarian battalion gaining the last victory point!!
In Napoleon at War you assess victory conditions at the start of each players turn and so the British with only their Guard cavalry regiment, 2 Light Cavalry regiments and an artillery battery quit the field.
The British had won 2 Victory points in routing the One of the French infantry brigades and beating the Cuirassiers. In totalling up glory points (the final score) the British got 9 glory points.
The French in gaining 5 victory points earns 30 glory points.
You would only bother with glory points if in a tournament.
Conclusion
This was a very hard fought victory for the French. The British are very difficult opponents and it is notoriously difficult to attack. This scenario perhaps gives the attacker some advantage as they can start the battle with all non reserve forces on the table whilst the defender can only start with half their forces on table. We both thoroughly enjoyed the game and the fact that it went to the last throw of the last turn meant the drama levels were extremely high. Great stuff :-)