My friend and fellow gamer Chris came down for a game. He's been out of the loop for a little while (since the Leipzig game) but he has been working on his Russian army. So we decided to give them a go. Also, it was highly appropriate as it was the 200th anniversary of the battle of Champaubert the next day.
We played 1750 pts each.
As usual we diced for scenario and got number 1 'Assault on a prepared position.' We then diced to see who was attacker and given that honour always seems to fall on my shoulders I was pleasantly surprised when Chris rolled higher and took the roll of attacker. It's been quite a while since I was defending. The scenario title implies the defender has field works but actually they don't. But with equal points this is (as always) a very tough scenario for the attacker.
Especially when, as I did, the defender rolls up a village on the random terrain generator ;-)
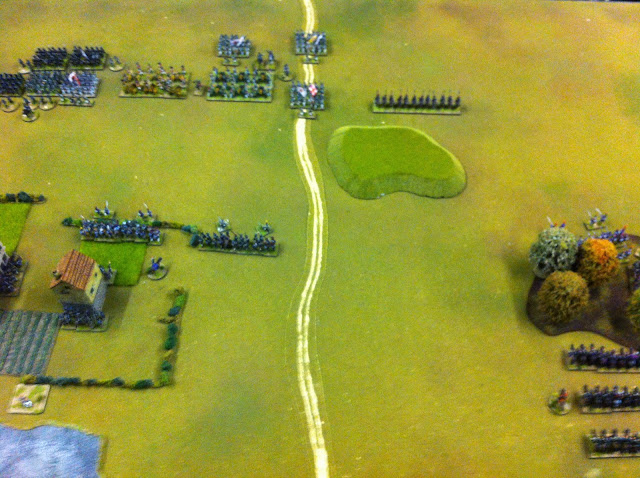
The terrain was as below in the picture, a village (placed by me), a hill (placed by Chris), a wood (placed by me) and impassable terrain, in this case a lake (placed by Chris).

The forces involved were as follows,
My French Infantry division was made up of
Infantry brigade - 4 battalions (1 line, 3 conscript, all Understrength).
Infantry brigade - 3 battalions (1 line, 2 conscript, all Understrength).
1 Heavy artillery battery
Light cavalry brigade - 2 Lancer, 1 Chasseur
In reserve I had,
Infantry brigade - 3 battalions (3 conscript, all Understrength).
Heavy cavalry brigade - 2 Dragoon regiments.
1 Horse artillery battery.
Reserves start off table and have to be rolled for.
As for the Russians Chris also had an Infantry division. (The eagle eyed will spot some Prussians as stand ins).
Infantry brigade - 3 battalions
Infantry brigade - 3 battalions
Infantry brigade - 3 battalions
Jäger brigade - 3 battalions
Heavy artillery battery
Light foot artillery battery
Artillery general
Cossack regiment
In reserve he had
Heavy cavalry brigade - 3 Cuirassier regiments
Prior to deployment we placed an objective each in the defenders half of the table. The aim of the scenario is for the attacker to capture both objectives or force the defender to retire by gaining more Victory points than the defender has forces on table.
I placed my objective just behind the village and Chris placed his over on my right flank, forcing me to spread my defence.
As defender I deployed first. I placed my larger infantry brigade to hold the village.

I left a large gap in the centre for my cavalry to operate in but aware the Russians had a grand battery I hid the cavalry behind the woods.
The rest of my forces I deployed to cover the objective on the right. This I felt was more exposed and the more likely area Chris would attack.

But as you can see from the pictures above, Chris placed his entire on table force against the village leaving the objective on the French right unopposed. At this point I was in aware of the what the Russians held in reserve and being unfamiliar with the Russians I expected a large reserve to arrive to contest the objective on the right.

Chris deployed his Grand battery opposite the village and my infantry held its breath.

Turn 1
As expected the Russian infantry advanced with Cossacks covering their left flank and BOOM! The grand battery opened up and inflicted heavy losses on the French to their front.

The Russian infantry advanced further in their support move but luckily no reserves arrive.

In the French turn the infantry that were outside the village tried move away from the fire of the grand battery (annoyingly the photo greyed out at the bottom so you can't see them.)

I swung my heavy battery to try and bring it into the battle

and moved my cavalry to oppose the Cossacks.

I too failed to get any reserves.
Turn 2
The Russian advance progressed and the grand battery continued to do thier worst on the Poor French infantry. The Russians charged the infantry at the front of the village

and destroyed them!

The Russians assaulted the building with 3 battalions but two failed to charge home and the other retired from melee.

The village is looking vulnerable already but again Russian reserves failed to show.

In the French turn the Heavy artillery were able to bring the Cossacks under the guns and do some damage.

The French Lancers charged the Cossacks

but, naturally enough the Cossacks evaded contact

Then I got a real stroke of luck. A brigade of Italian conscripts arrive :-).

I brought them on in support of the village.

Turn 3
In maneuvering my cavalry I had brought them out from the cover of the woods. The Russian grand battery spotted the opportunity and swung it's heavy battery around to pound the cavalry and

BLIMEY! It got 16 hits with one round of firing ( despite defective gunpowder) and annihilated the poor cavalry.....OUCH!

The other battery set a building in the village on fire!

And the Russian infantry continued to assault the village but the French stubbornly held on.

Worryingly for the French the Russians rolled on some reserves and the Russian Heavy cavalry brigade arrived, but it was alone, and Chris opted to bring it on behind his advancing infantry!

I'd expected any reserves to tackle the objective on the French right but the objective remains uncontested! The fact the Russian Cuirassiers arrived alone also indicated the Russians had no more reserves. For me this constituted a huge mistake by the Russians.
The remaining French cavalry moved to the right and made sure they took cover from the Russian guns.

The infantry in the Building successfully put out the fire

and the Italians moved to support the village and cover the objective.

With no effort against my right flank there was now no way the Russians would take both objectives.
Also, even if the Russians took the village and destroyed both brigades and took the objective they would not have enough points to win the game.


Chris agreed he couldn't win now and conceded the game. Even if the he took the village It would take too long to get his resources over to the other flank to win.

This game came down to the Russians deciding to throw everything they had at the village and not contesting the other objective. It's difficult for me to say what Chris was exactly thinking. I suspect he hoped to take the village very quickly and felt he would have time to switch his whole army to the other flank to win.
For my part once it was clear that Chris was totally committed against the village I felt I would probably win. That's because the total amount of points to be gained from taking the village was 3 (the objective plus the two infantry brigades.) Therefore as long as I didn't get drawn in to the battle around the village and throw in more forces (potential victory points) to hold that objective, time would run out for the Russians. That's why I brought my reserves on my right flank and not to help hold the village.
You may feel it was a bit gamey of me to play the battle this way. And ultimately, your right. I could have made more of a fight for the village but, to be frank, I needed a win for my own morale fibre as I've not had much luck with my own attacks lately ;-)


