Steve and I got together last Friday for another game of Napoleon at War. Steve had gone for Austrians again and so I was French. We upped the points from 1500 to 1750 each. We rolled for a scenario and got 1, 'Attack on a prepared position'. We then diced off to see who was attacker and the honour fell on my shoulders.
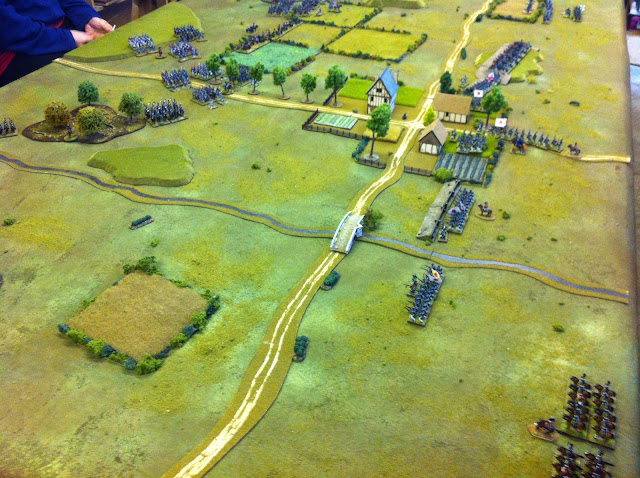
We rolled up for terrain, only four pieces and the table ended up like this.
I rolled up a village and as they make I good defensive position I tucked it away in the corner. Steve placed one objective centrally on the road, I decided to place the second over on my left. The woods on the right would be too in the way if I had gone the other side.
As defender the Austrians deployed first. They started with
Infantry brigade = 4 Infantry battalions and 1 Artillery battery.
Infantry Brigade = 4 Infantry battalions and 1 Hussar regiment.
Cavalry artillery ( not quite as good as horse artillery).
A this point I had no idea what the Austrian reserves were.
As with many scenarios the aim is for the attacker to either capture both objectives or break the enemy (gain more victory points than the enemy has active forces).
I started on table with
Infantry Brigade = 3 Conscript battalions
Infantry Brigade = 1 line battalion and 4 Conscript battalions
Heavy artillery battery
Foot artillery battery
Artillery general
Light cavalry brigade = 1 Hussar regiment and 2 Lancer regiments.
The artillery batteries and artillery General were combined into a grand battery ( artillery re rolls misses :-))
In reserve
Cavalry brigade = 2 Dragoons
I deployed the 3 battalion battery on he extreme left flank with the Grand battery opposite the Austrian brigade artillery. The plan was for the Grand battery to silence the enemy guns and help weaken the force whilst throwing the infantry brigade against the same force, hoping to break the force and take the objective.
The 5 battalion brigade was deployed in the centre to strike against the other significant Austrian force. My cavalry were deployed on the right with the aim of taking on the Austrian cavalry and supporting the infantry assault in the center.
What could possibly go wrong?
Turn 1
To kick off the French infantry on the far left commenced their advance and the artillery start to fire on the Austrian artillery. The Austrian brigade battery lost a base (hooray!) but managed to take out a French foot gun in counter battery fire (boooo!)
In the center the Infantry advance
And on the right the cavalry move forward to cover the infantry and manoeuvre in ready mess to take on the Austrian Hussars.
No French reserves arrive :-(
The Austrians (unaware of the French plans) uncharacteristcally (for Austrians) act decisively and instead of waiting to be attacked launch their own offensive!!
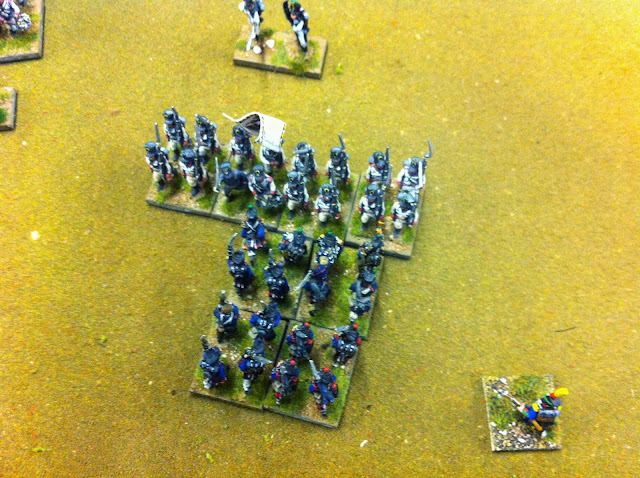
On the French left they successfully charge
And destroy a conscript battalion
And in the center they strike
And force back a French battalion
The Austrian Hussars, instead of waiting to be enveloped gallope forward and strike for the French Line
battalion. The French hussars counter charge
But fail to help the infantry and are forced to retire.
So the Austrian Hussars continue and breakthrough onto the French line battalion. Luckily few casualties are inflicted and the infantry survive!
And the Hussars retire.
At the end of turn 1 things are going not how the French had antisipated.
Turn 2
It's only turn 2, early days so the French stick to the plan. The battalions on the far left prepare to assault the Austrian line whilst the French artillery destroy the Austrian brigade artillery (hooray!)
In the center the French prepare their assault but the left hand battalion takes a pasting from the Austrian return fire!
The cavalry get ready to charge the Austrian hussars.
But the Hussars are too experienced to get encircled and evade the French lancers.
On the left the French charge through a storm of musketry taking casualties and make contact...
But.................is that it? I hear you cry.........yes, the French inflict 1 hit only!!! Out of 5 dice.
The second battalion doesn't even make contact so both fall back (in disgrace)
In the center two battalions charge ( one at a time)
both fall back (again, in disgrace)
Once again French reserves fail to arrive :-(
On the French left the Austrians move to take advantage of the poor French performance.
In the center the heroic Austrian battalion that saw off 2 French assaults falls back out of the firing line.
The Austrian musketry destroys the half strength battalion.
The Austrian Hussars fall back to support the now deployed cavalry artillery whilst the infantry form square.
On the French left the Austrians charge the rear of the retiring French infantry and destroy them! The remaing unit passes it's force morale test and so stays in the action.
To finish a disastrous turn for the French the Austrian reserve arrive.....both of them!!!
A brigade of 5 infantry arrives and advances through the village,
Whilst an Austrian light cavalry brigade of 1 chevaux leger and 1 Uhlan regiment arrive to help support the objective in the center.
Turn 3
The game has already felt like its slipped away for the French. Winning this scenario was now pretty impossible, still, it was worth carrying on to see if any breakthrough could occur.
In the center the French battalion try to reorganise.
And the French lancers line up a charge to hit the Cavalry battery on the hill.
The Grand battery targets an Austrian battalion and inflicts heavy losses.
The remaining battalion on the far left hurls itself at a fresh Austrian battalion hoping for a decisive win.
but despite an attached commander the French conscripts are destroyed in their effort!!!
In the center the Cavalry battery evades the charging lancers taking refuge in a nearby infantry battalion, thus ending hopes of a breakthrough.
Once again the French reserve failed to show.
At the end of the French phase of turn 3 the left flank looked like this
And the right flank looked like this.
So it was at this point I conceded the game. We were running out of time ( because Steve had to leave a bit early) and it was clear I was not going to break his army or capture both objectives.Conclusion
I wasn't sure about posting this AAR originally as it was a short game, not even completing 3 turns, but then I thought these sort of games do happen and and they are worth sharing. Also Steve's defence was very good and worth highlighting.
The French failure was due to a number of reasons.
First, I had not made the necessary sacrifices to the dice gods resulting in poor rolls through out the game. On turn 2 no less than 4 charges were attempted and each ended in failure. Few plans survive poor dice rolls!
Second, I don't think I used the grand battery properly. Units were not softened up prior to assaults and this proved costly. I probably should have been softening up the infantry prior to assaults rather than going for the Austrian artillery.
Third, there was not much combined arms attempted. This was partly because I spread the attack across the whole front instead of focusing the attack at specific points.
Fourth, the aggressive defence took away the initiative from the French and simply proved more effective than the French offensive.
Fifth, with all Austrian reserves on table and no sign of the French reserves the French were outnumbered quite quickly. A bad sign!
I'm sure there are more reasons if I think hard enough.
This scenario is possibly the hardest out of the 6 in the rule book for the attacker. If things don't go well for the attacker from the start then it's almost impossible. The game could have gone on longer and you never know what might have happened but I'm pretty sure it just wasn't my day.
The Austrians in defence are a very hard nut to crack. As I understand things Man at War are working on an 1813 campaign book and say the Austrians will be revised. Just how that revision will manifest itself we will have to wait and see, although there could be some free PDF downloads of the revised lists on their site soon.


